
Style findings in your reports
Choose how finding photos, written details and overlays are arranged in the finished report.
Updated
Finding styles control how site photos and their written information are presented to the reader. The right layout keeps photos useful, makes important details easy to scan and gives reports a consistent finish.
Set the company defaults
Company defaults are used when new report chapters containing findings are created. A report or chapter template can carry its own settings when a particular report type needs a different presentation.
In the app: Open Finding Settings · Settings → Report Findings
- 1Open Settings → Report Design → Findings.
- 2Under Findings Layout, choose a list or grid layout and the number of findings shown per page.
- 3Use the live page preview to compare the available space for each photo and its written details.
- 4Continue through Image Settings, Report Output Fields and Photo Overlays to finish the default presentation.
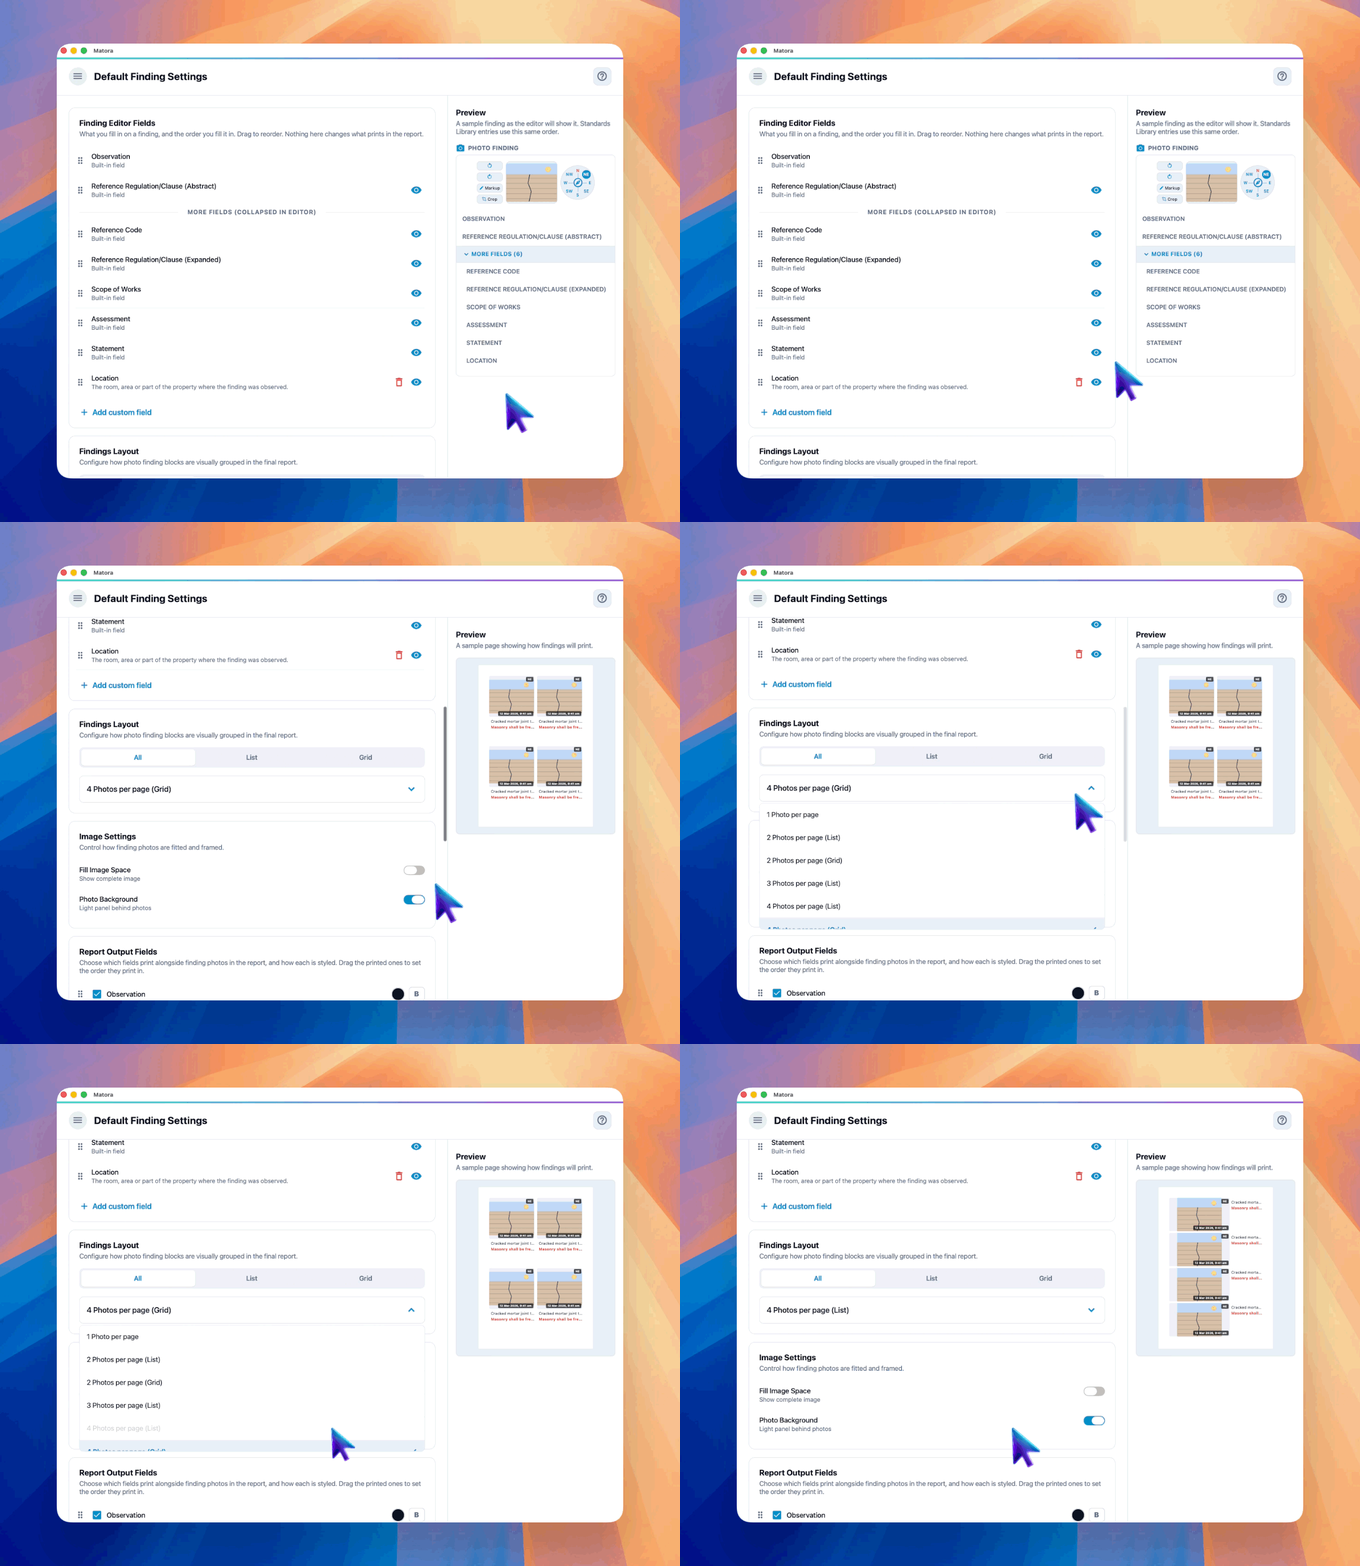
Use fewer findings per page when photographs or observations need close attention. Higher-density layouts work best when each finding is short and visually simple.
Control how photos fit
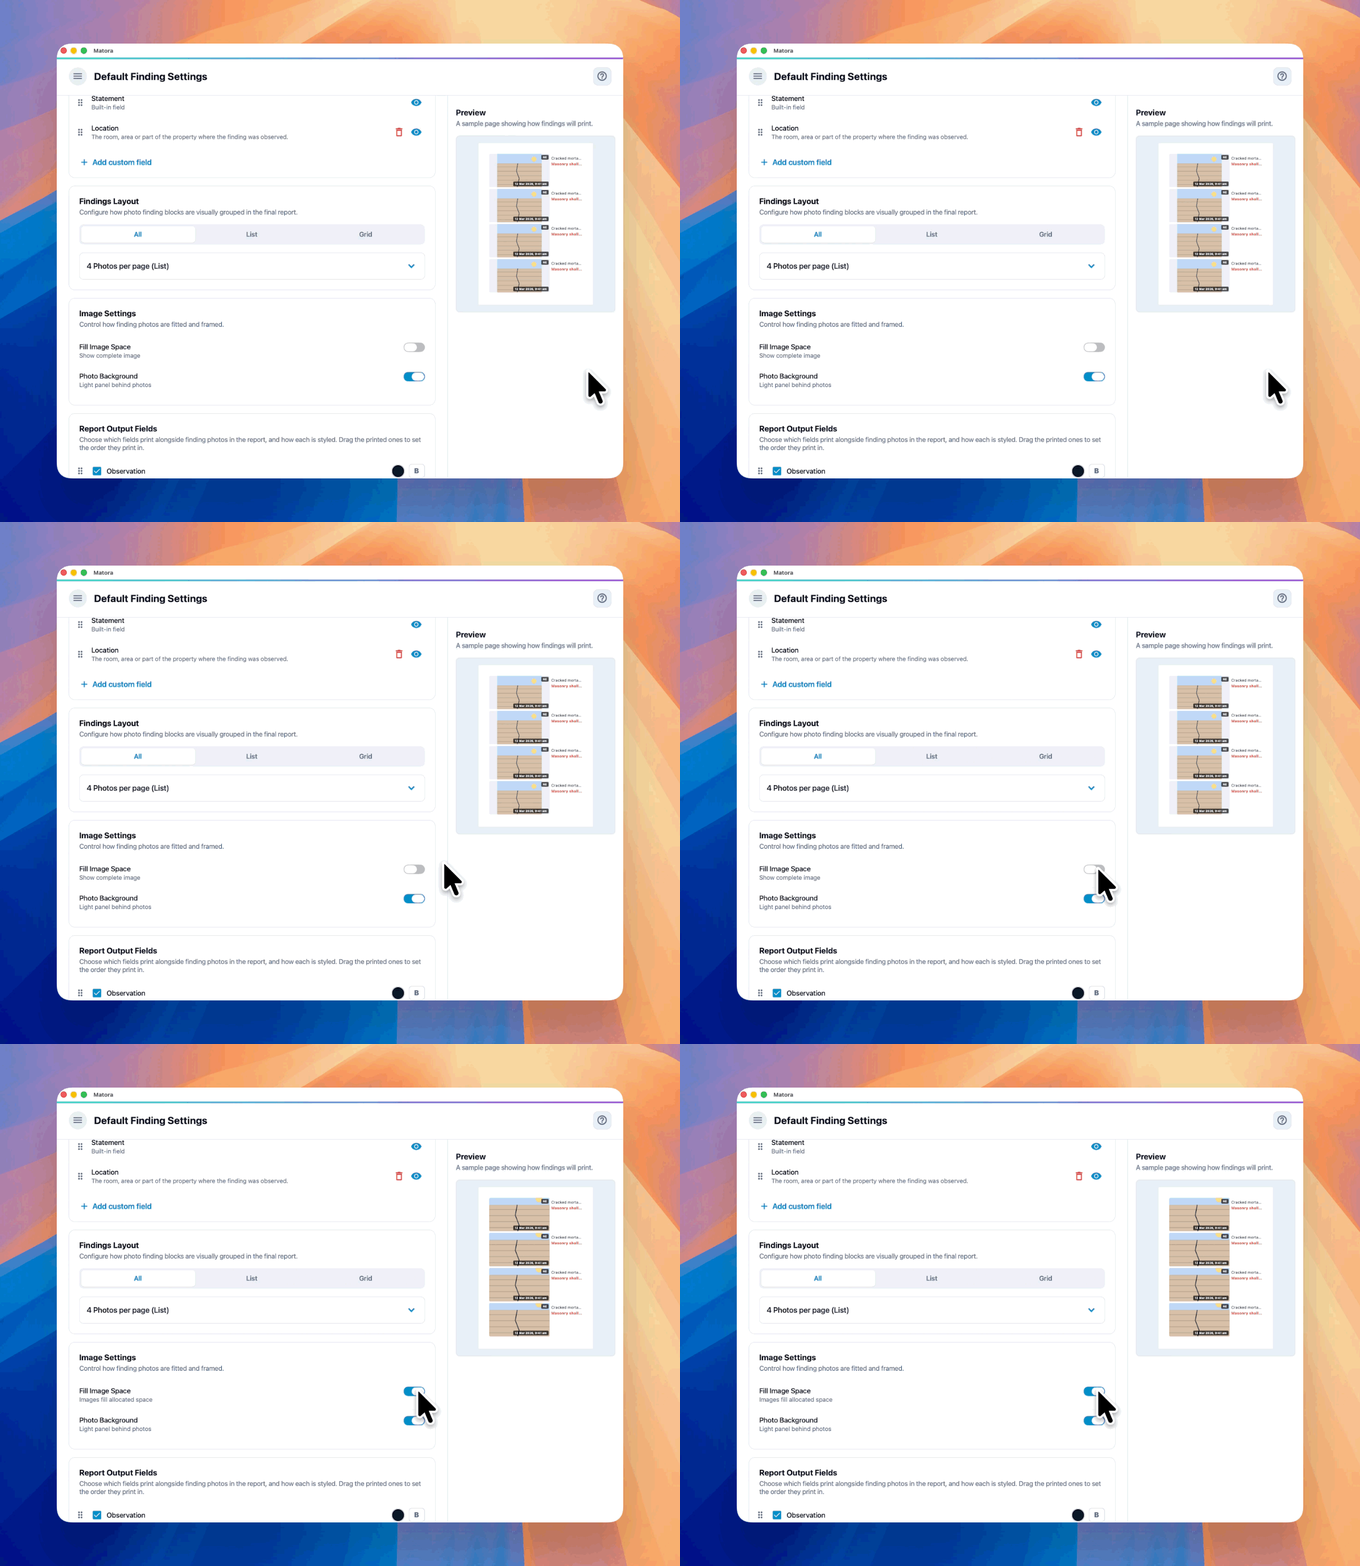
- Fill Image Space on: fills the allocated frame but may crop the edges of a photo.
- Fill Image Space off: shows the complete photo and may leave some empty space around it.
- Photo Background: adds or removes the light panel behind finding photos.
Choose what prints beside each photo
Report Output Fields controls which completed finding fields appear in the report. Checked fields print in the order shown; fields below Not printed remain available in the editor but are omitted from this photo layout.
- 1Check the fields that should print beside finding photos.
- 2Drag the checked fields into the order readers should see them.
- 3Select a colour dot to change a field’s text colour.
- 4Use the B button when a field should print in bold.
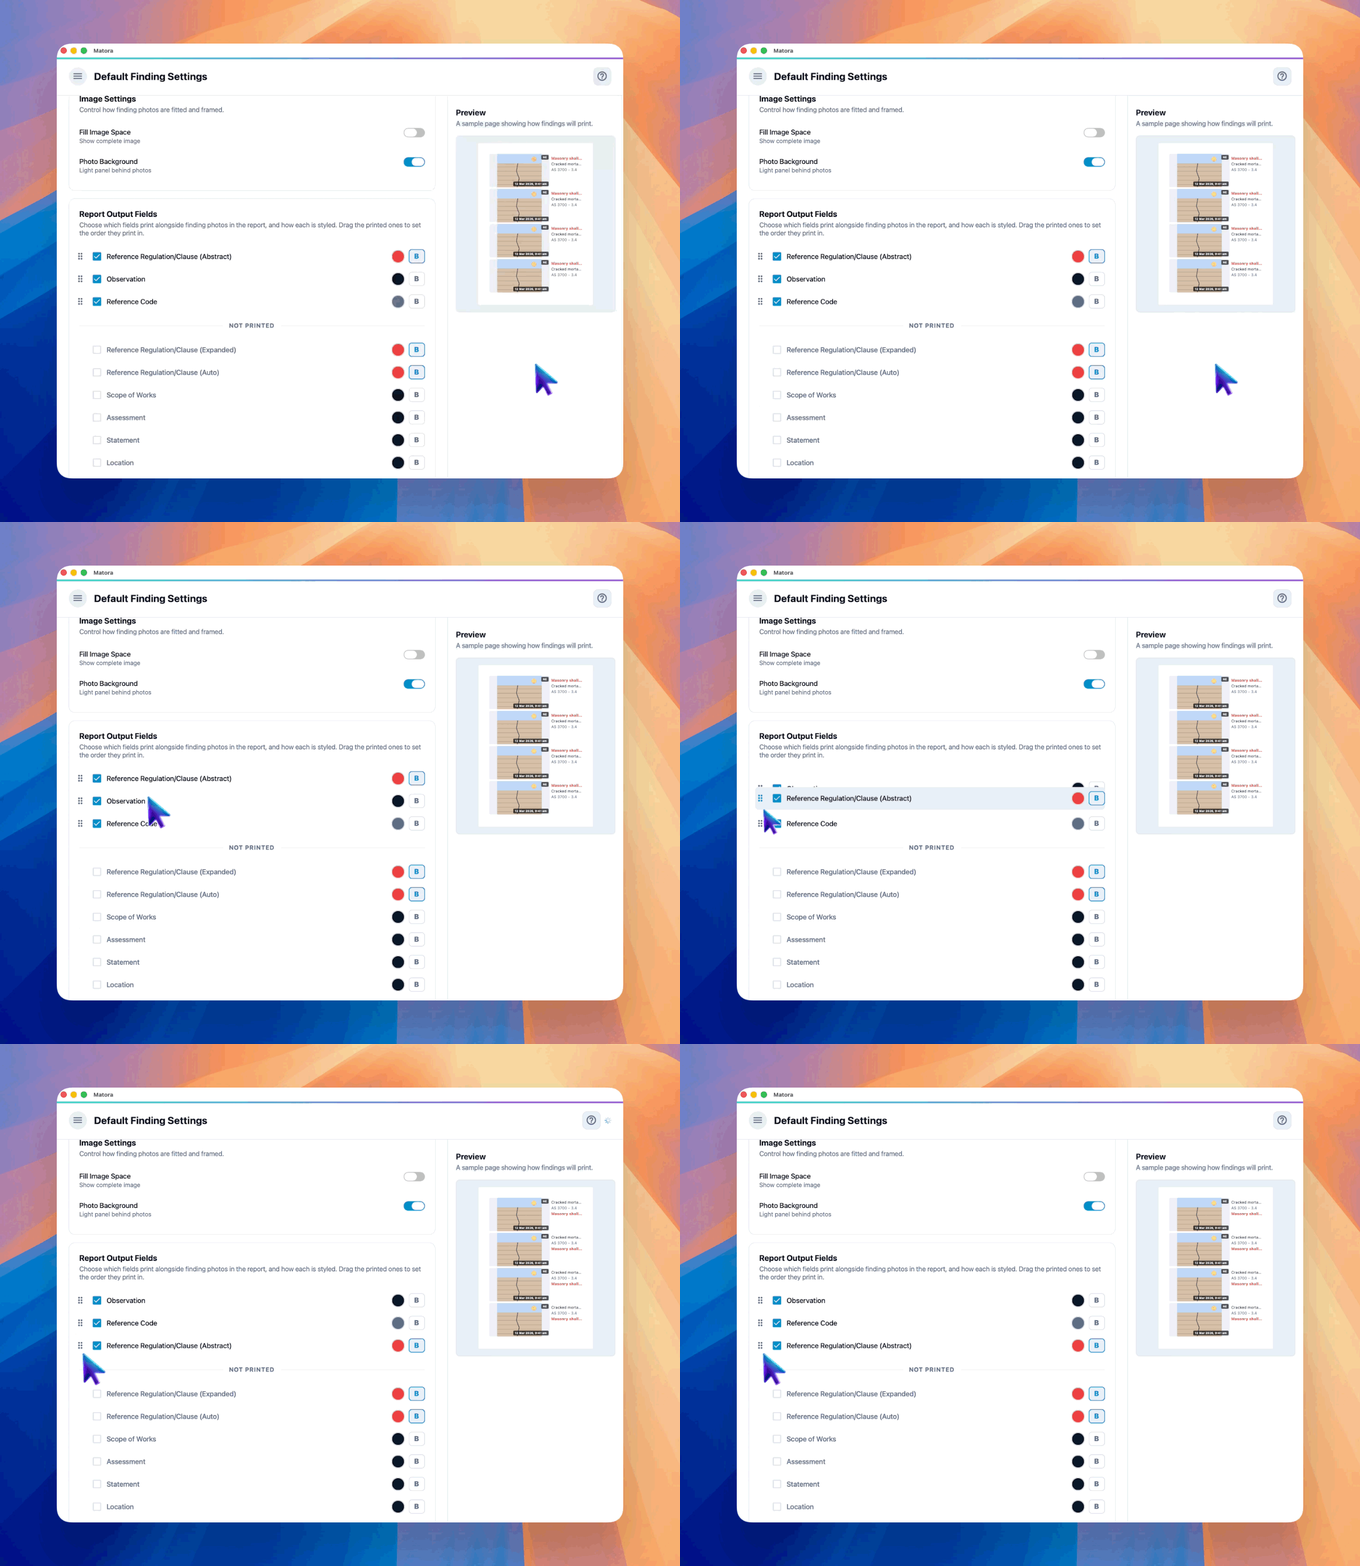
Finding Editor Fields controls what inspectors fill in. Report Output Fields controls what readers see beside photos. A field can remain available for data entry without being printed here.
Use colour sparingly. One consistent accent on an important field, such as a regulation or assessment, usually creates a clearer hierarchy than colouring every field.
Choose the photo overlays
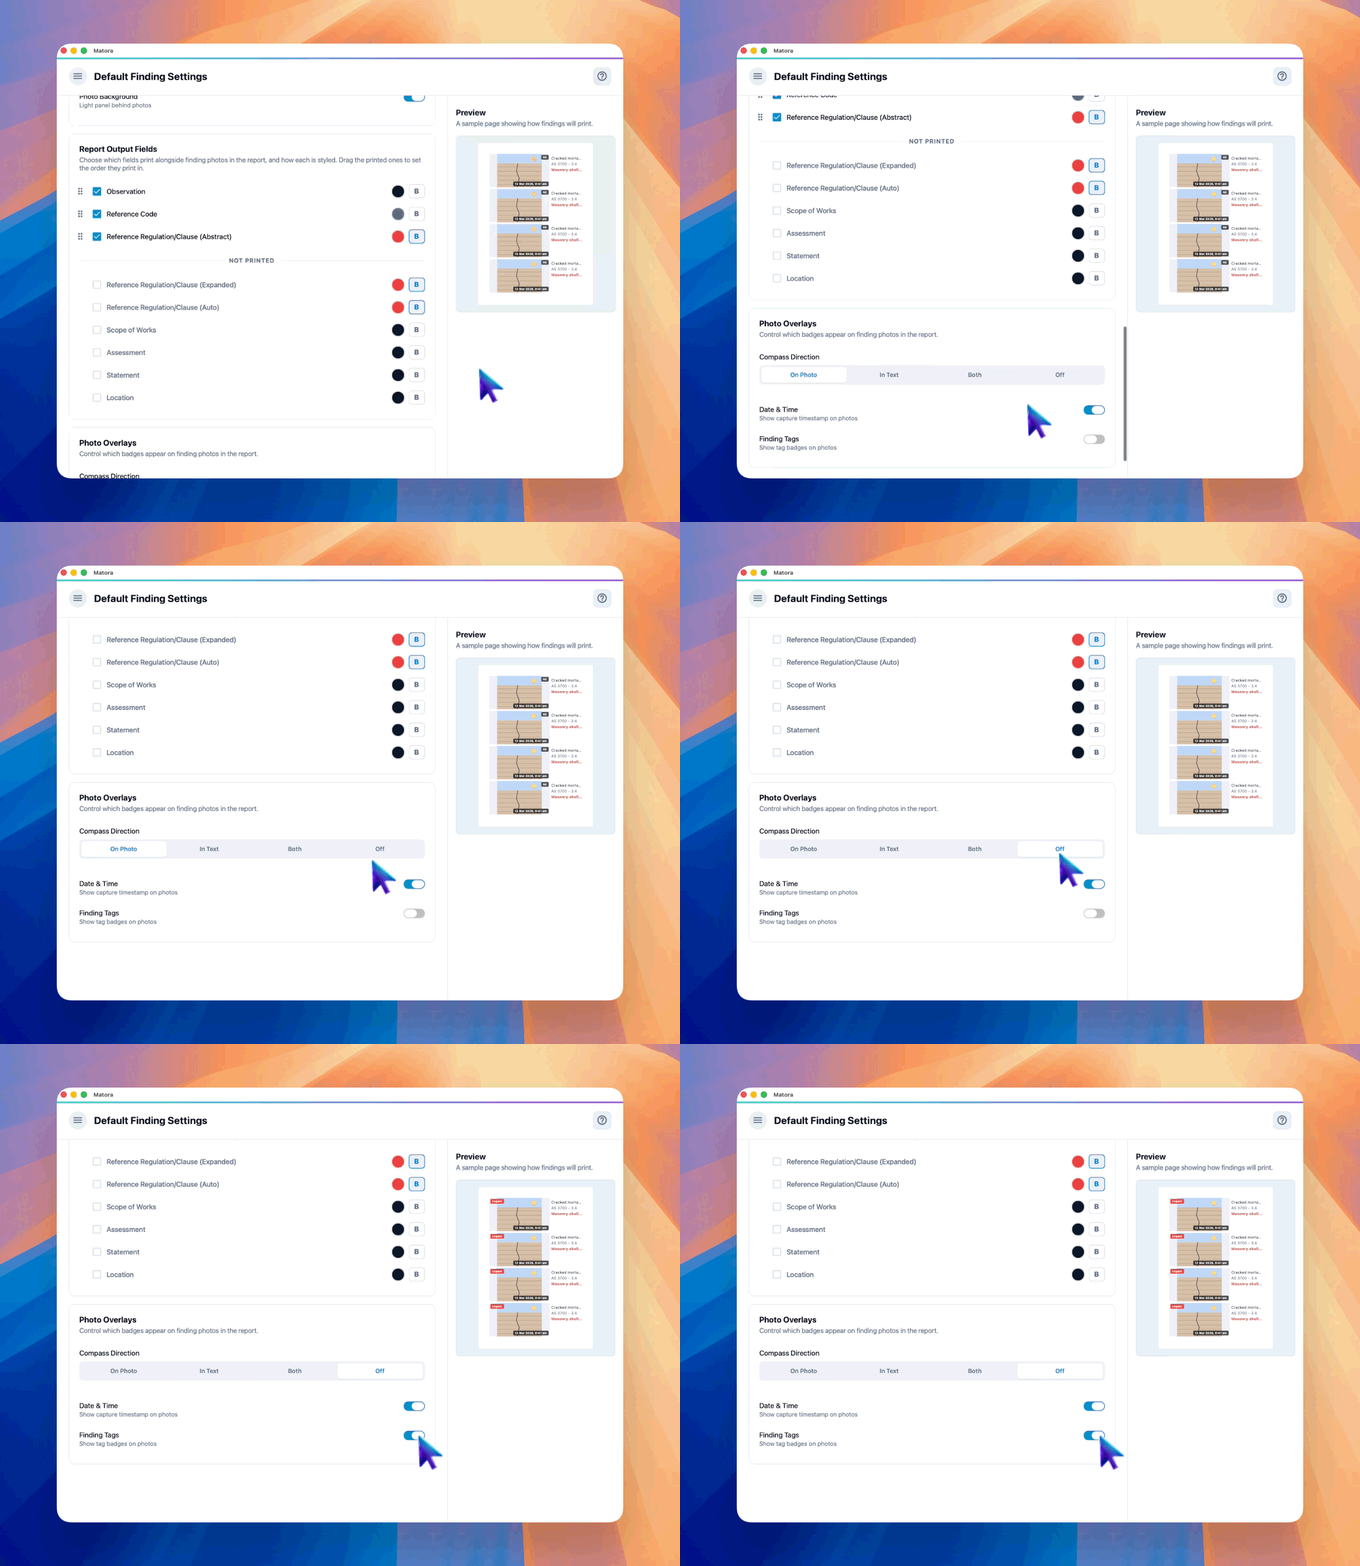
- Compass Direction: show it on the photo, in the written text, in both places or not at all.
- Date & Time: show or hide the capture timestamp on the photo.
- Finding Tags: show the assigned tag as a coloured badge on the photo.
Override the layout for a report
An individual chapter can use different finding presentation settings without changing the company defaults. This is useful when one report contains a chapter that needs larger photographs or different printed fields.
- 1Open a report chapter that contains at least one finding.
- 2Open the chapter tools and select Findings Layout.
- 3Adjust the layout, image settings, report output fields or overlays while checking the live preview.
- 4Select Done to keep the change on that chapter, or Apply to All Chapters to replace the finding presentation settings across the current report.
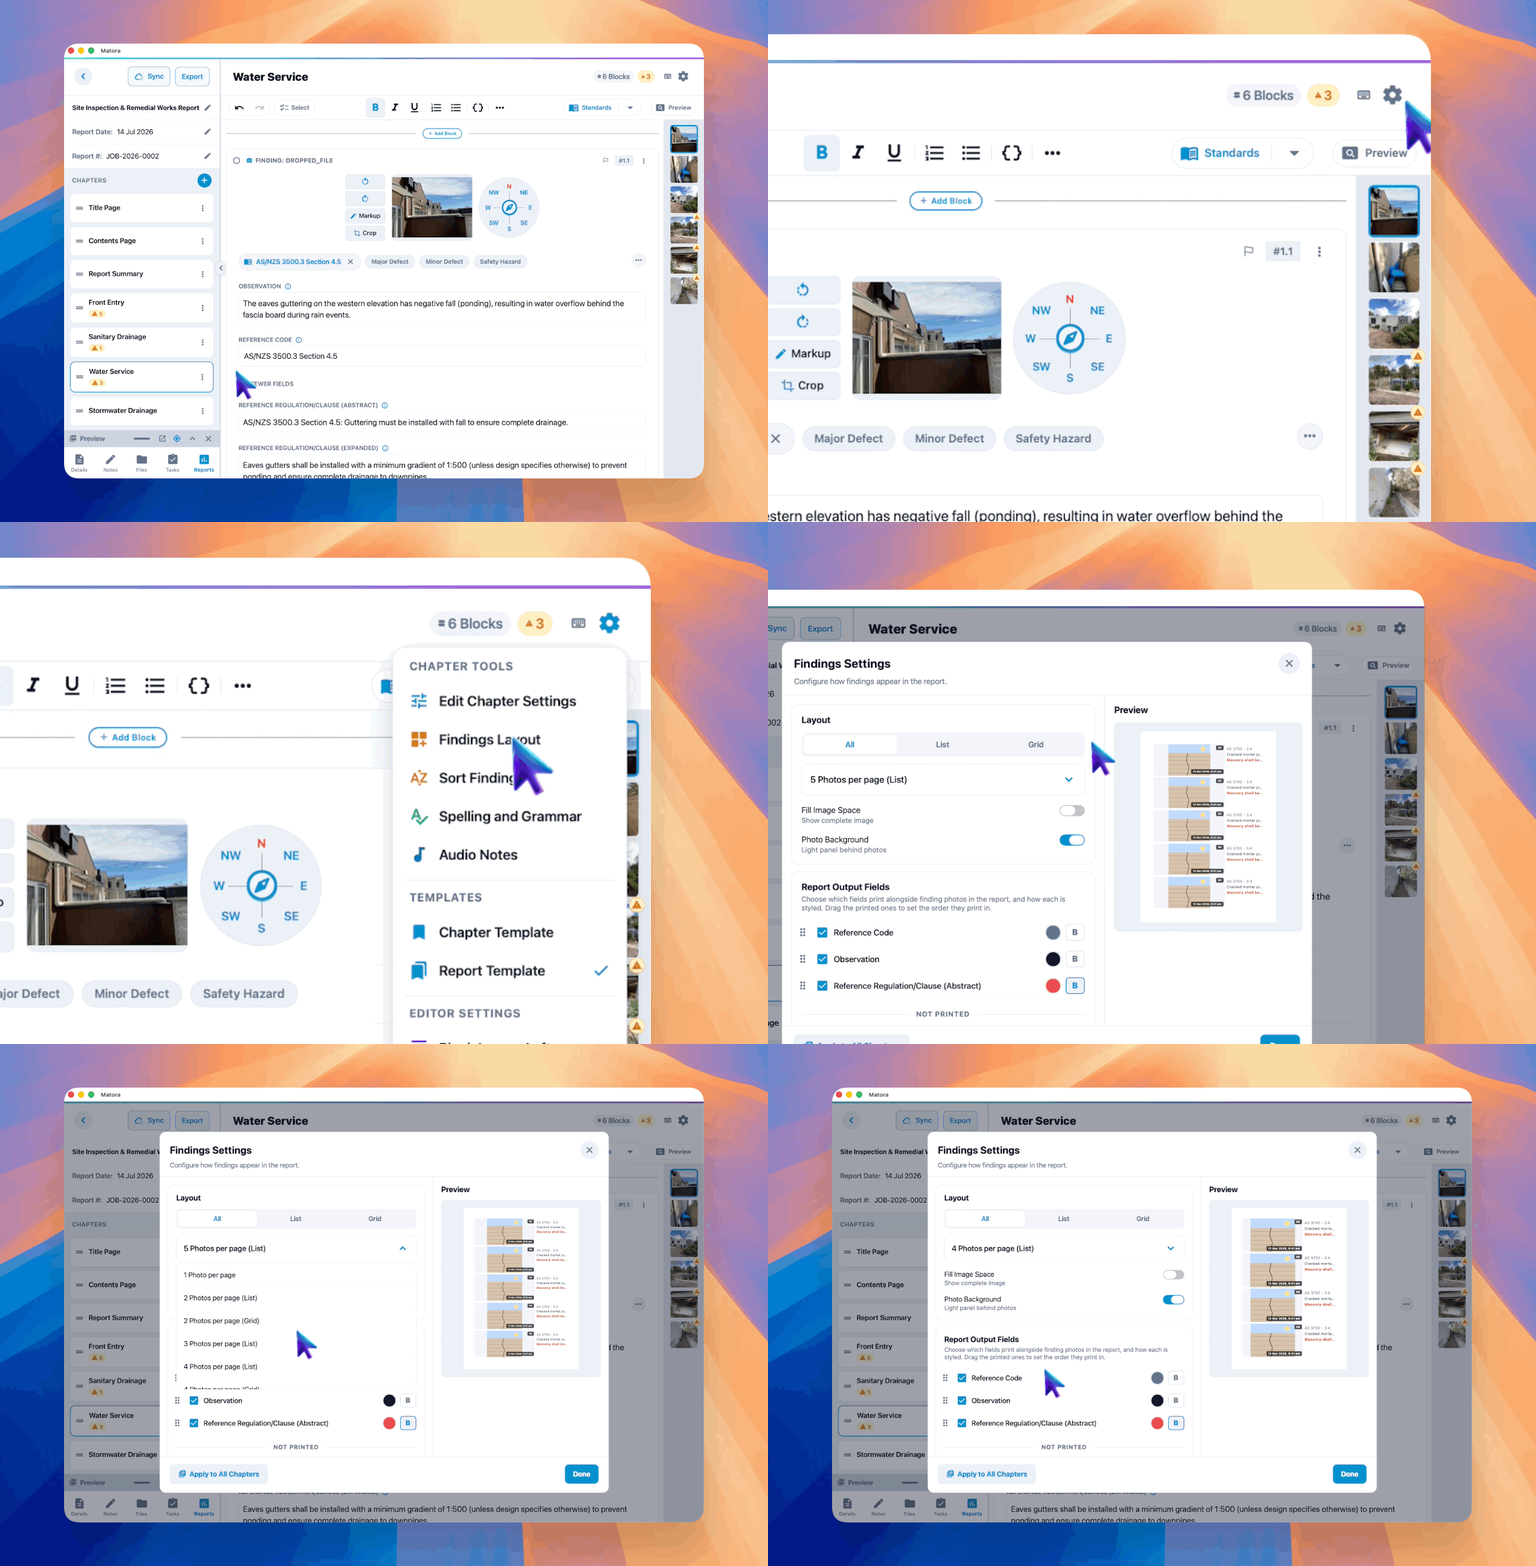
Apply to All Chapters replaces the finding presentation settings currently stored on every chapter in that report.
Check a realistic report
Preview or export a report containing long and short observations, portrait and landscape photos, and several overlay combinations. Confirm that text remains readable and important parts of each image are not obscured or cropped.