
Customise your finding fields
Choose what inspectors fill in on a finding, arrange the editor and create fields that suit your company’s reporting workflow.
Updated
Finding fields structure the information recorded with each photo. Matora includes fields for observations, reference information, scope of works, assessments and statements, and you can add company-specific fields when your workflow needs something different.
Editor fields and report output fields
The Findings settings screen contains two field lists with different purposes.
- Finding Editor Fields control what inspectors can fill in while creating or editing a finding.
- Report Output Fields control which completed fields print beside finding photos in the finished report.
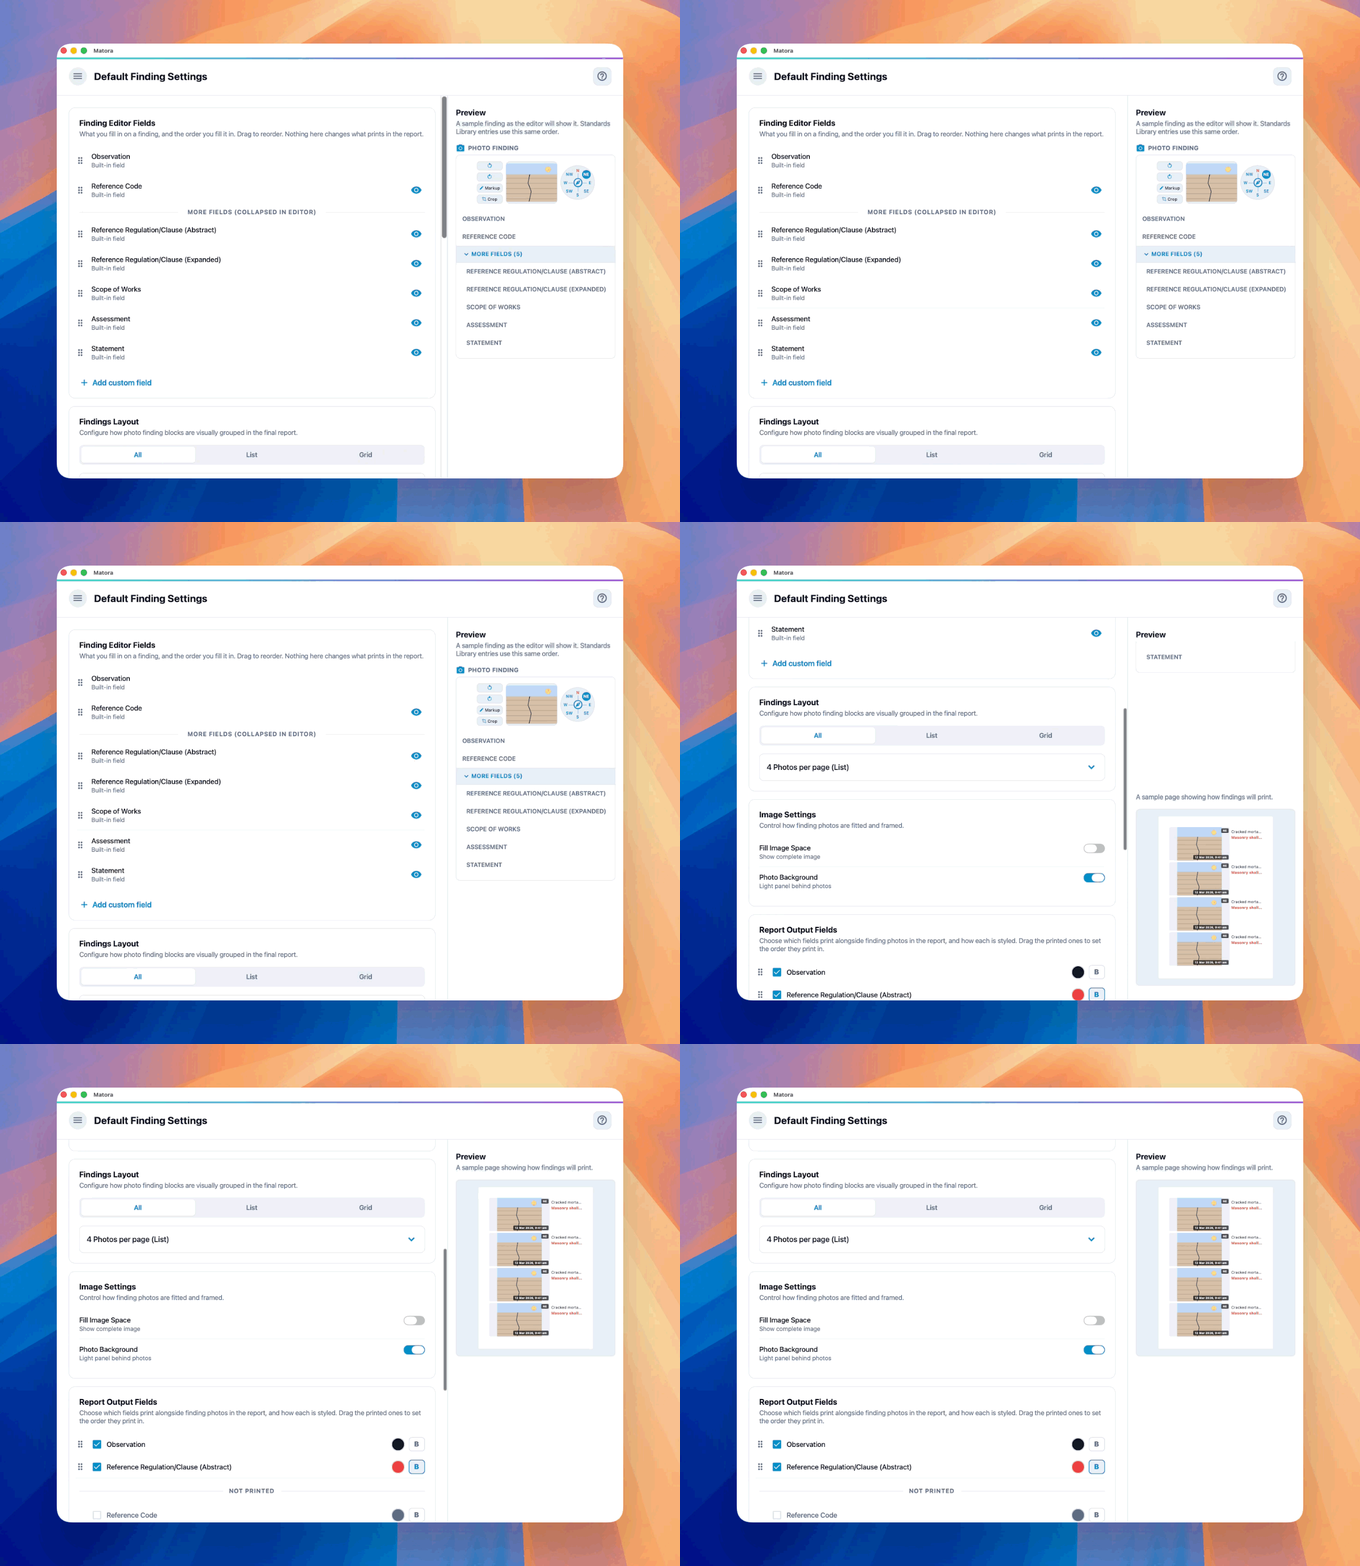
Changing the Finding Editor Fields does not automatically change what prints. Use Report Output Fields when you want to add or remove information beside report photos.
Arrange the finding editor
In the app: Open Finding Settings · Settings → Report Findings
- 1Open Settings → Report Design → Findings.
- 2Under Finding Editor Fields, drag the fields into the order your team normally completes them.
- 3Place the two most frequently used fields above the More fields divider.
- 4Select the eye beside a field to hide or restore it in the finding editor.
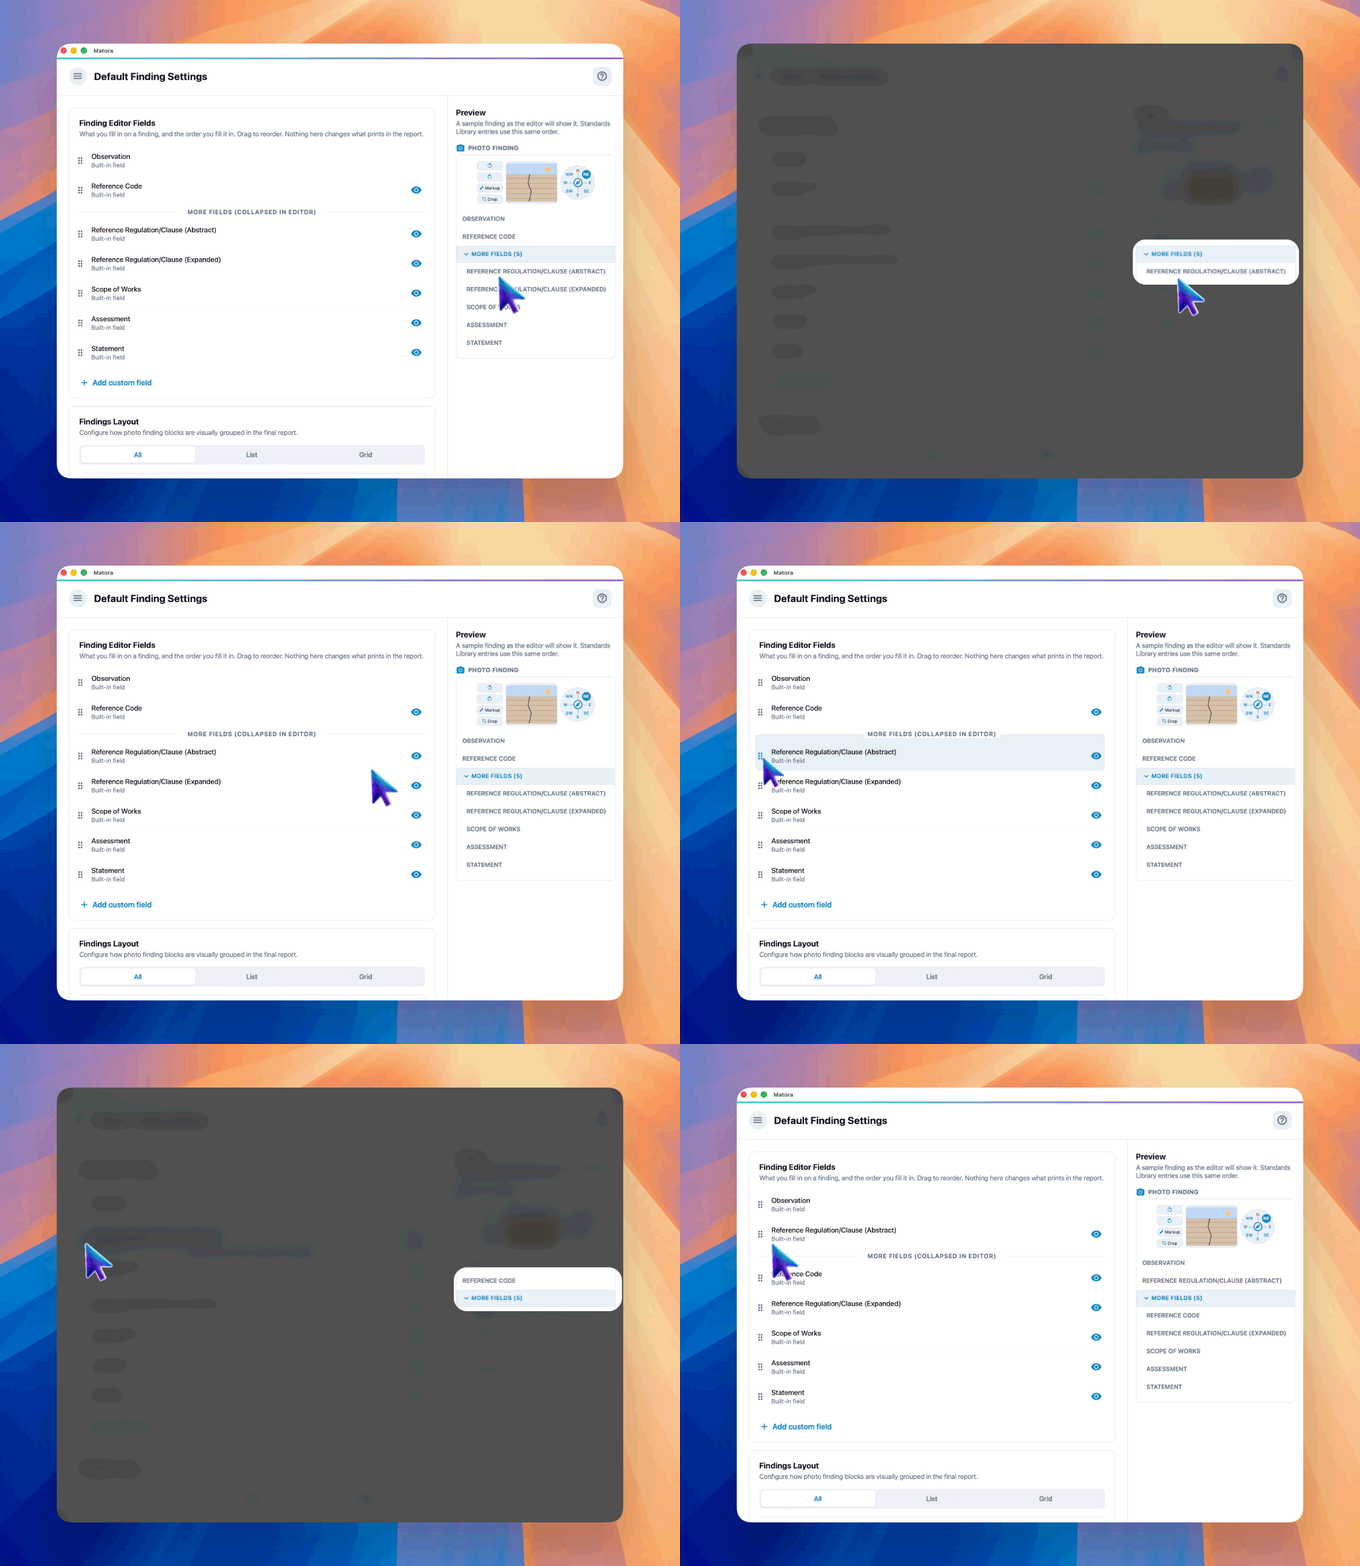
Keep the two primary positions for information entered on nearly every finding, such as Observation and Reference Code. Less common fields remain available under More fields.
Hiding a field removes it from the finding editor, but it remains available in the Standards Library. Standards Library entries use the same field order.
Create a custom field
- 1Select Add custom field.
- 2Enter a short field name and an optional description explaining what should be recorded.
- 3Save the field, then drag it into the appropriate editor position.
- 4Add it under Report Output Fields if its completed value should also print beside finding photos.
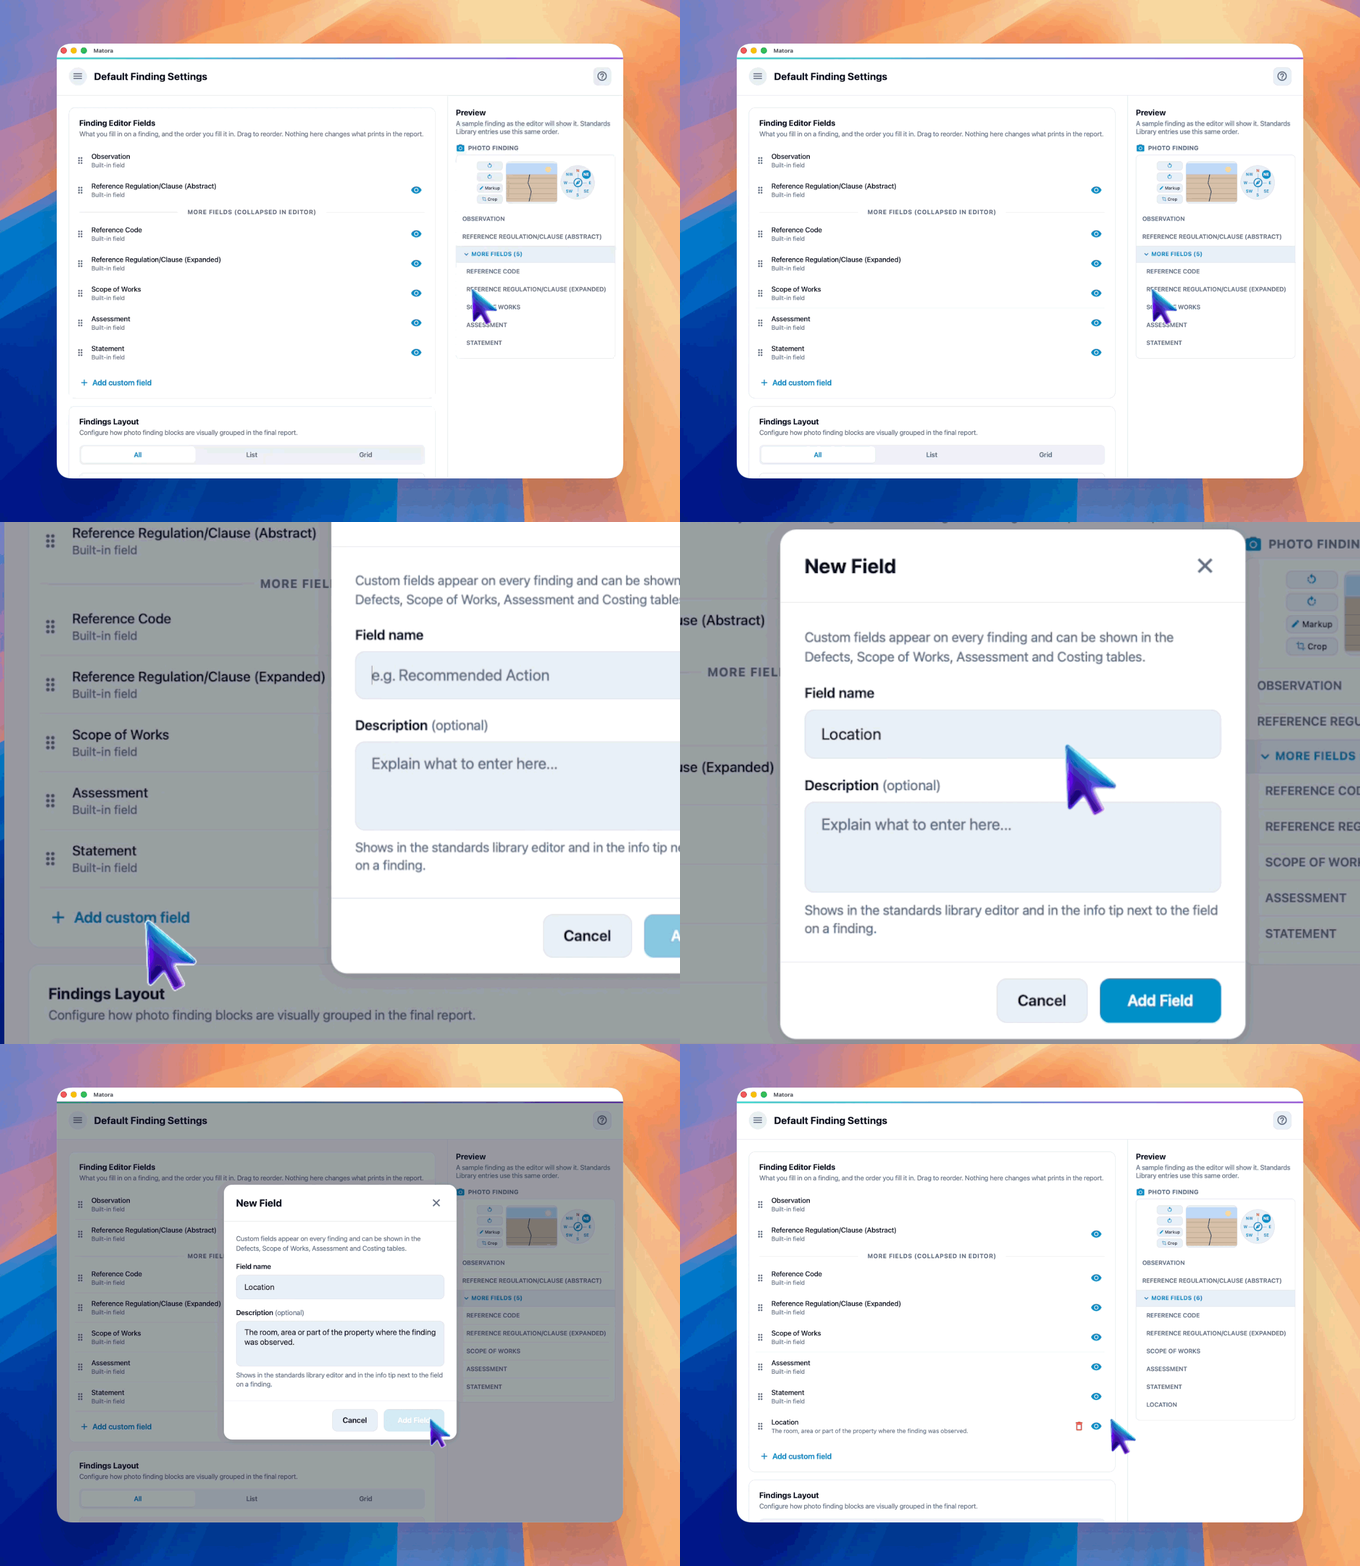
Custom fields can also be populated in Standards Library observations and used as configurable data points in supported finding tables. Useful examples might include Room or Area, Risk Rating, Responsible Party or another detail required by your reporting process.
Hide or delete a field
Hide a field when your team does not currently need it but may use it later. Delete a custom field only when the company no longer needs that data point anywhere. Built-in fields can be hidden but cannot be deleted.
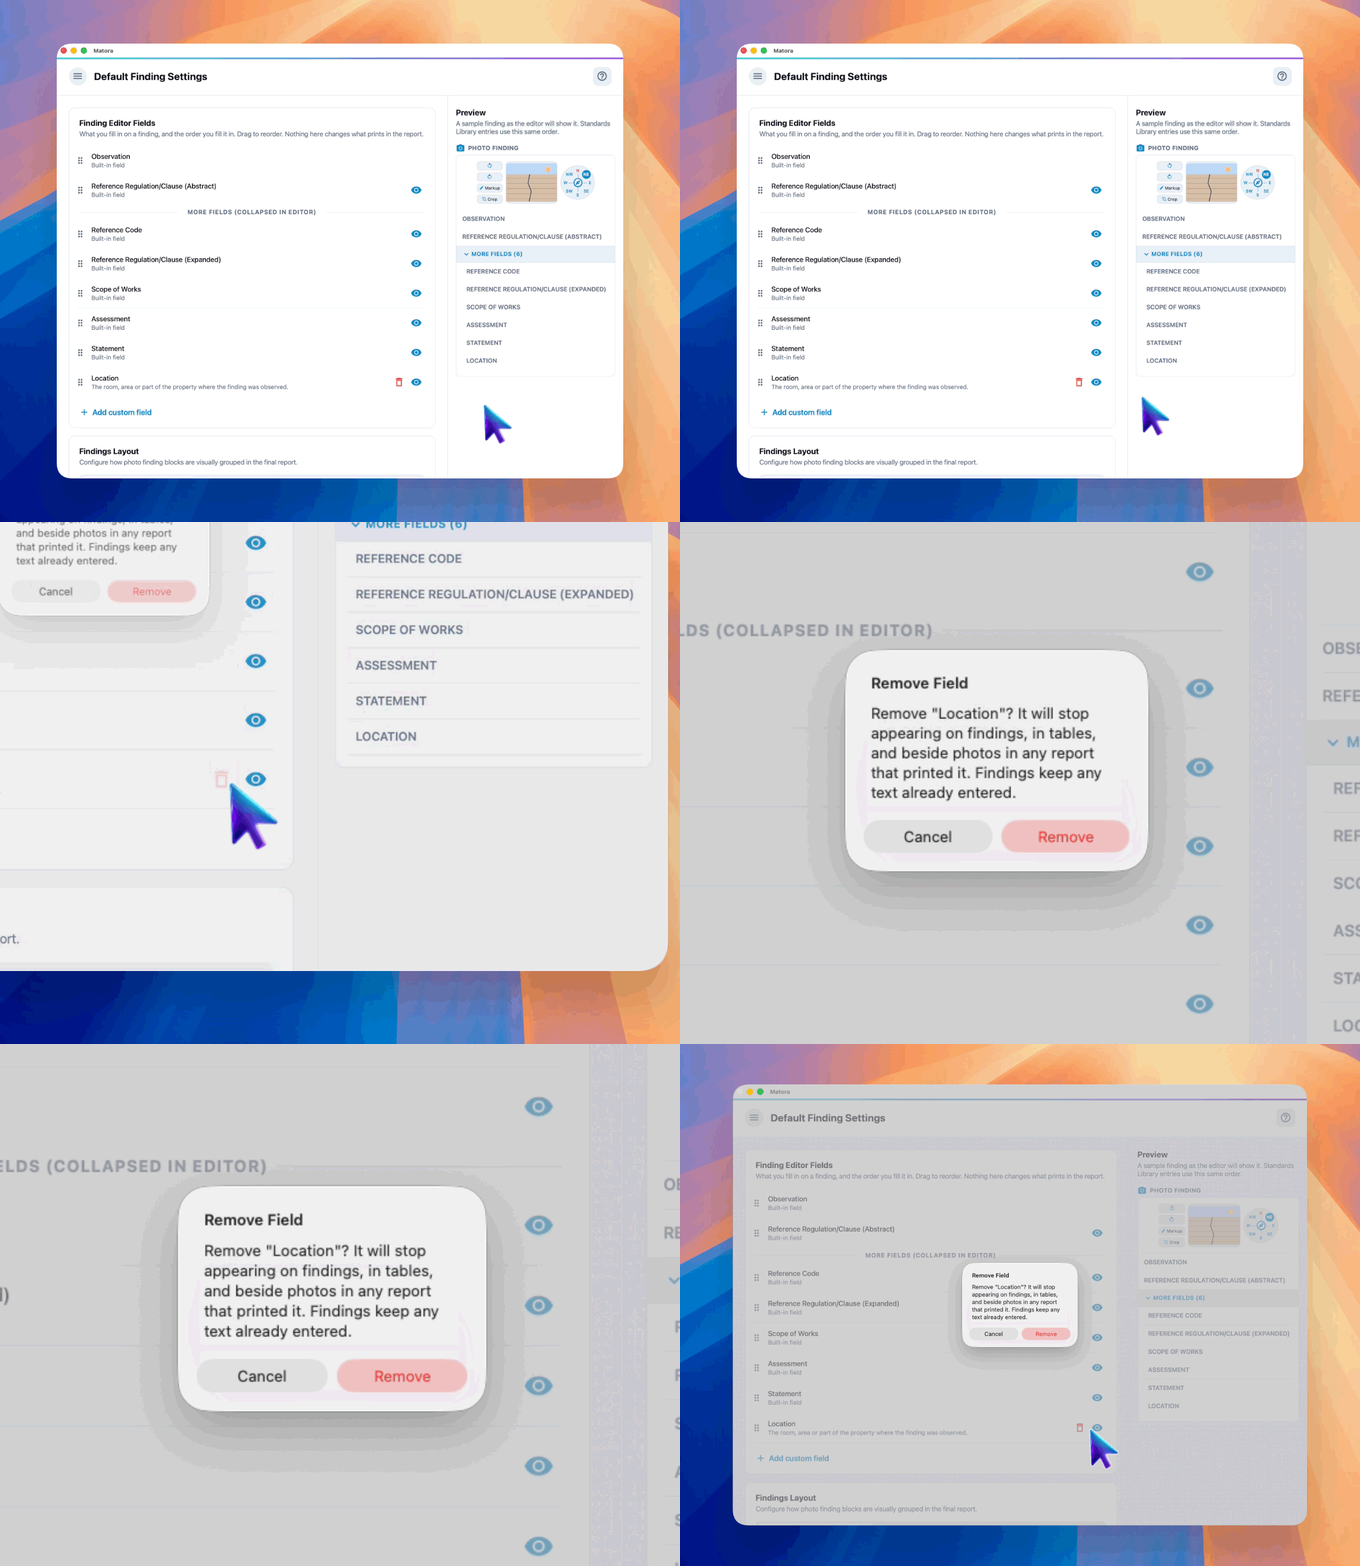
Deleting a custom field removes it from the finding editor, report output, supported tables, report chapters and chapter templates. Existing findings keep text already entered, but that field stops printing. If Standards Library entries contain values for it, Matora asks for a second confirmation before permanently deleting that library data.
Finding default changes save automatically. Use the live preview to confirm the editor remains quick and clear for the people entering findings on site.