
Create and use finding tags
Classify findings with consistent labels and colours, then use tags to filter information and highlight it in reports.
Updated
Finding tags are reusable labels that classify observations by severity, category or another company-defined purpose. Examples include Major Defect, Minor Defect, Safety Hazard or Further Investigation.
Why use finding tags?
- Give inspectors a consistent way to classify findings.
- Use colour to make important categories easier to recognise.
- Filter supported tables, summaries and custom lists to particular tags.
- Optionally show a coloured tag badge over the finding photo.
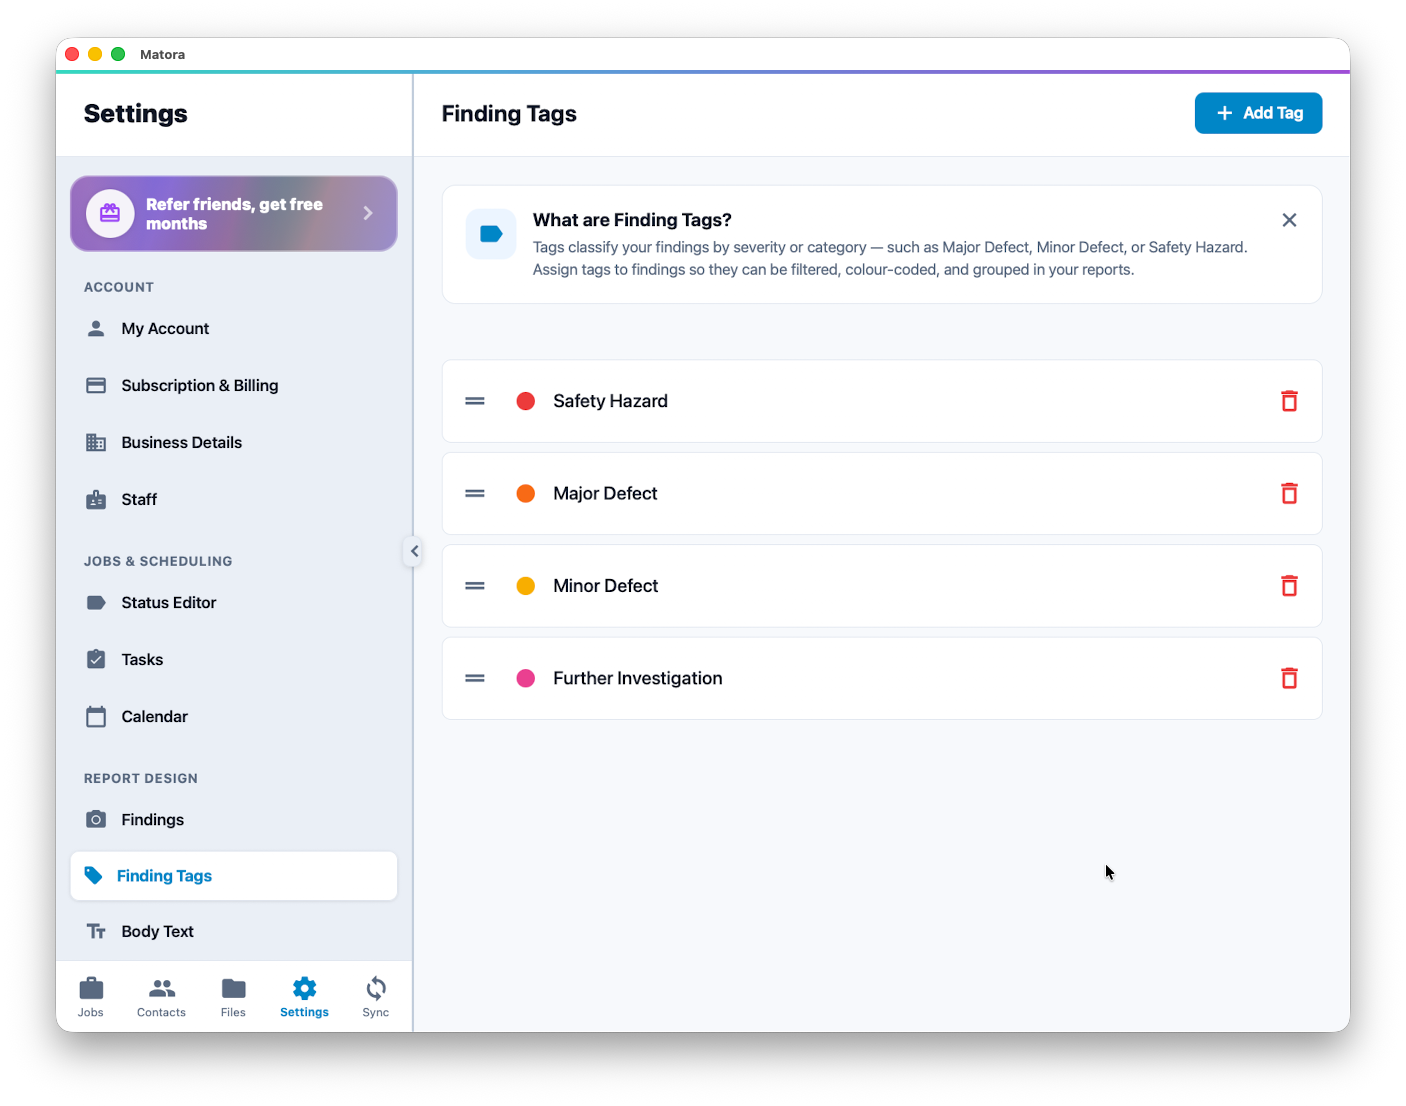
Create your company tags
In the app: Open Finding Tags · Settings → Finding Tags
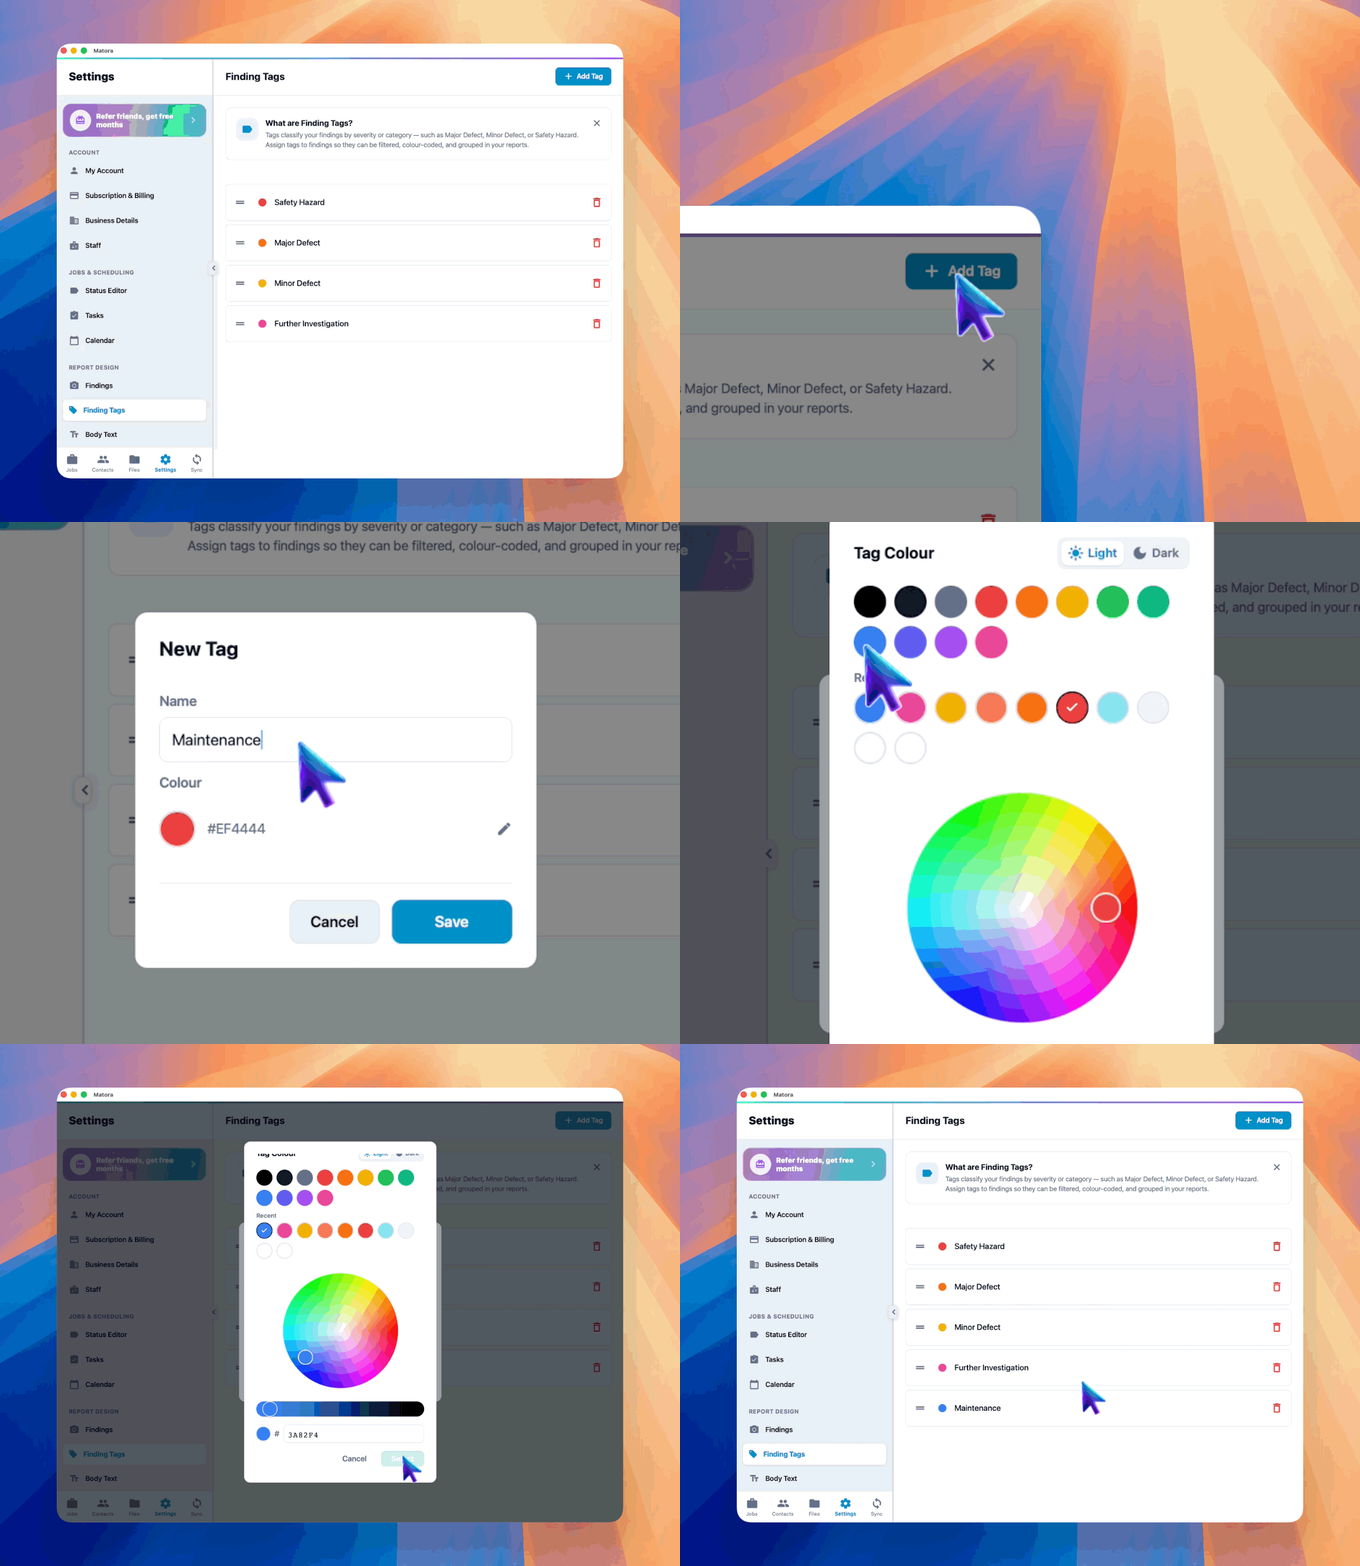
- 1Open Settings → Report Design → Finding Tags.
- 2Select Add Tag.
- 3Enter a clear, reusable name and choose a colour.
- 4Select Save, then drag tags into the order inspectors should see them.
Keep the tag list focused. A small set of clearly different categories is usually faster to apply and easier for clients to understand than many overlapping labels.
Apply tags to a finding
- 1Open the finding in a report chapter.
- 2Select one or more tag chips above the finding fields.
- 3Select an active tag again if it should be removed.
- 4Use the three-dot tag button when you need to manage the available tags.
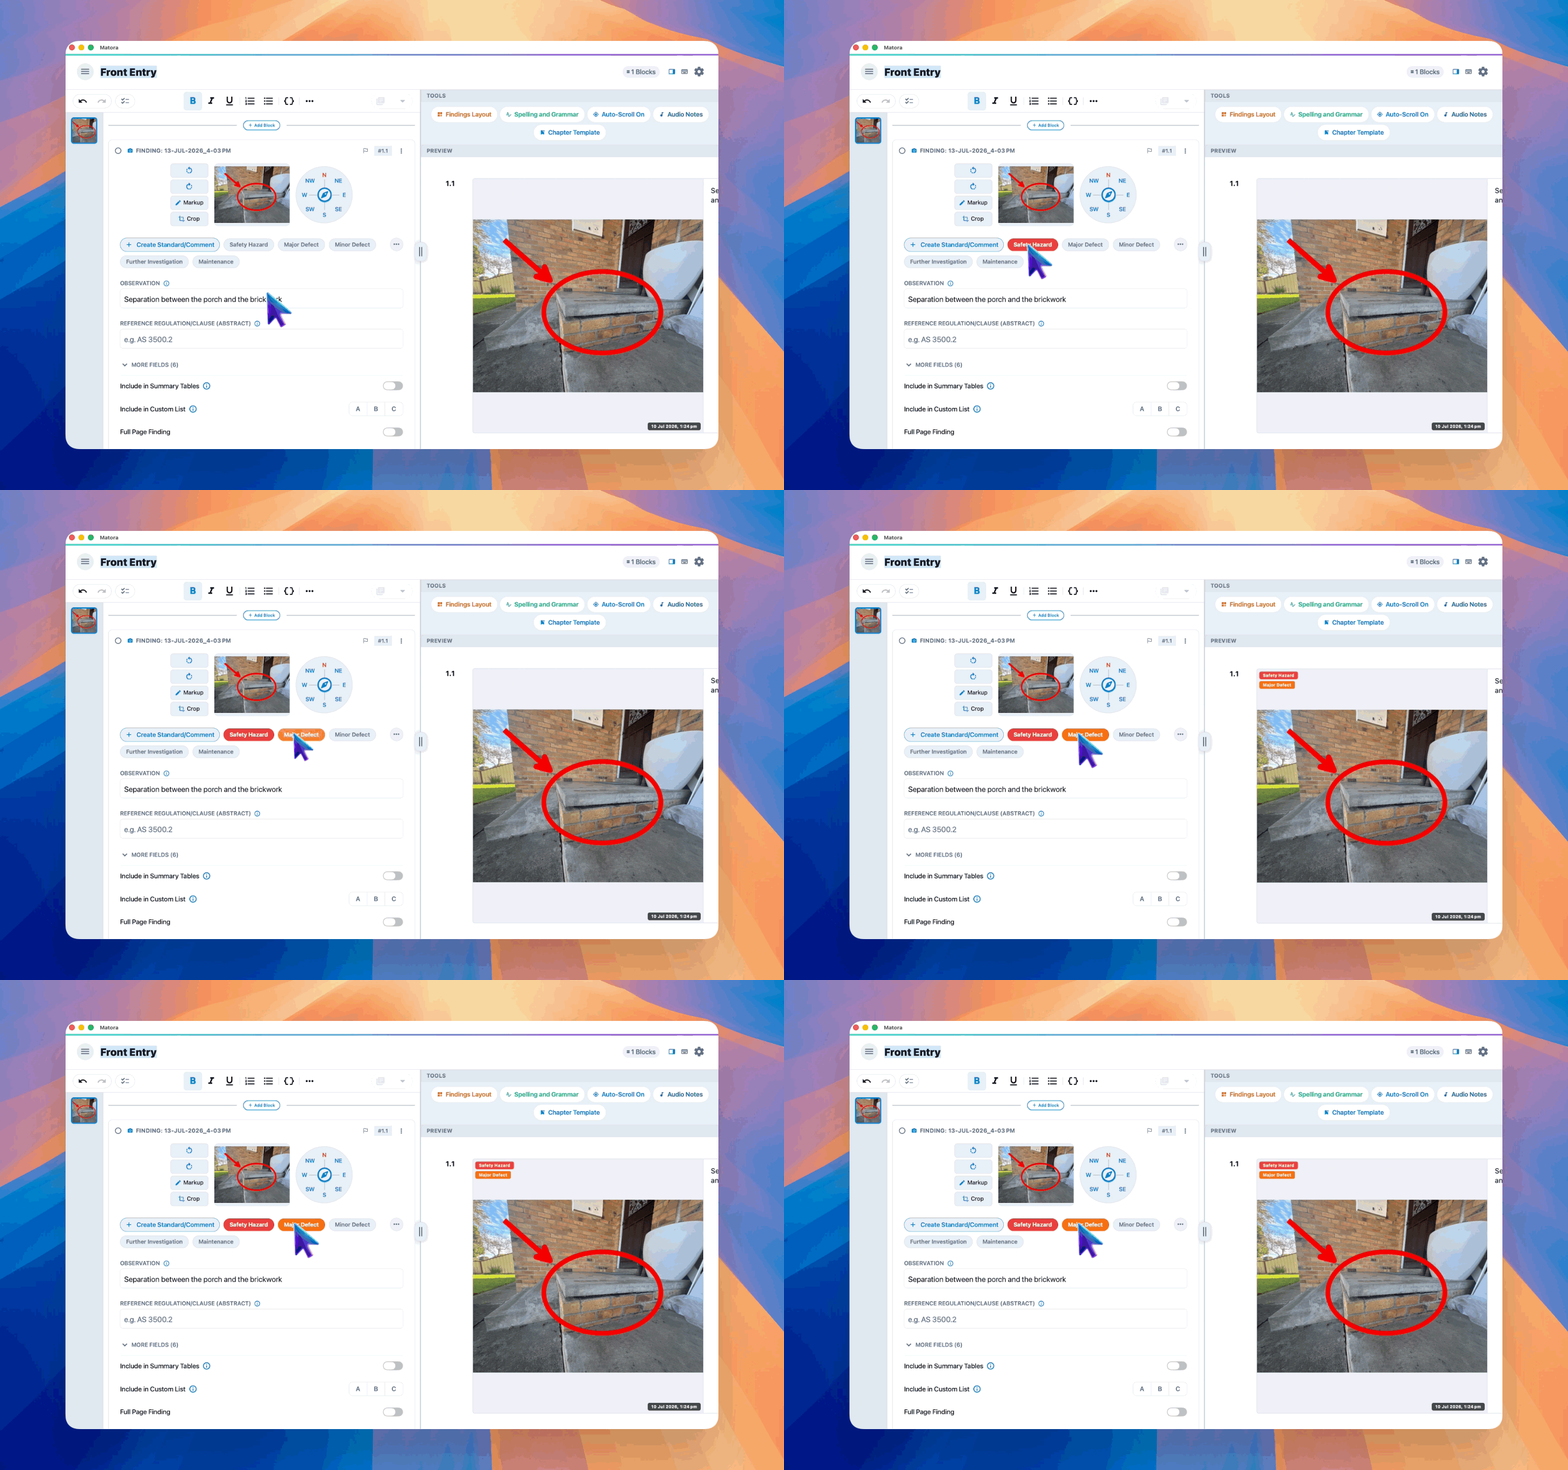
A finding can have more than one tag. When several tags are used as a filter, supported report blocks can match findings with any selected tag or require all selected tags.
Reuse tags with the Standards Library
A Standards Library observation can store default tags. When that observation is inserted into a finding, its default tags are applied automatically. If you change tags on a finding linked to a standard, Matora can also offer to save that change back to the library entry.
Default tags are useful when the same standard observation should nearly always carry the same classification, such as a recurring safety hazard.
Show tags on report photos
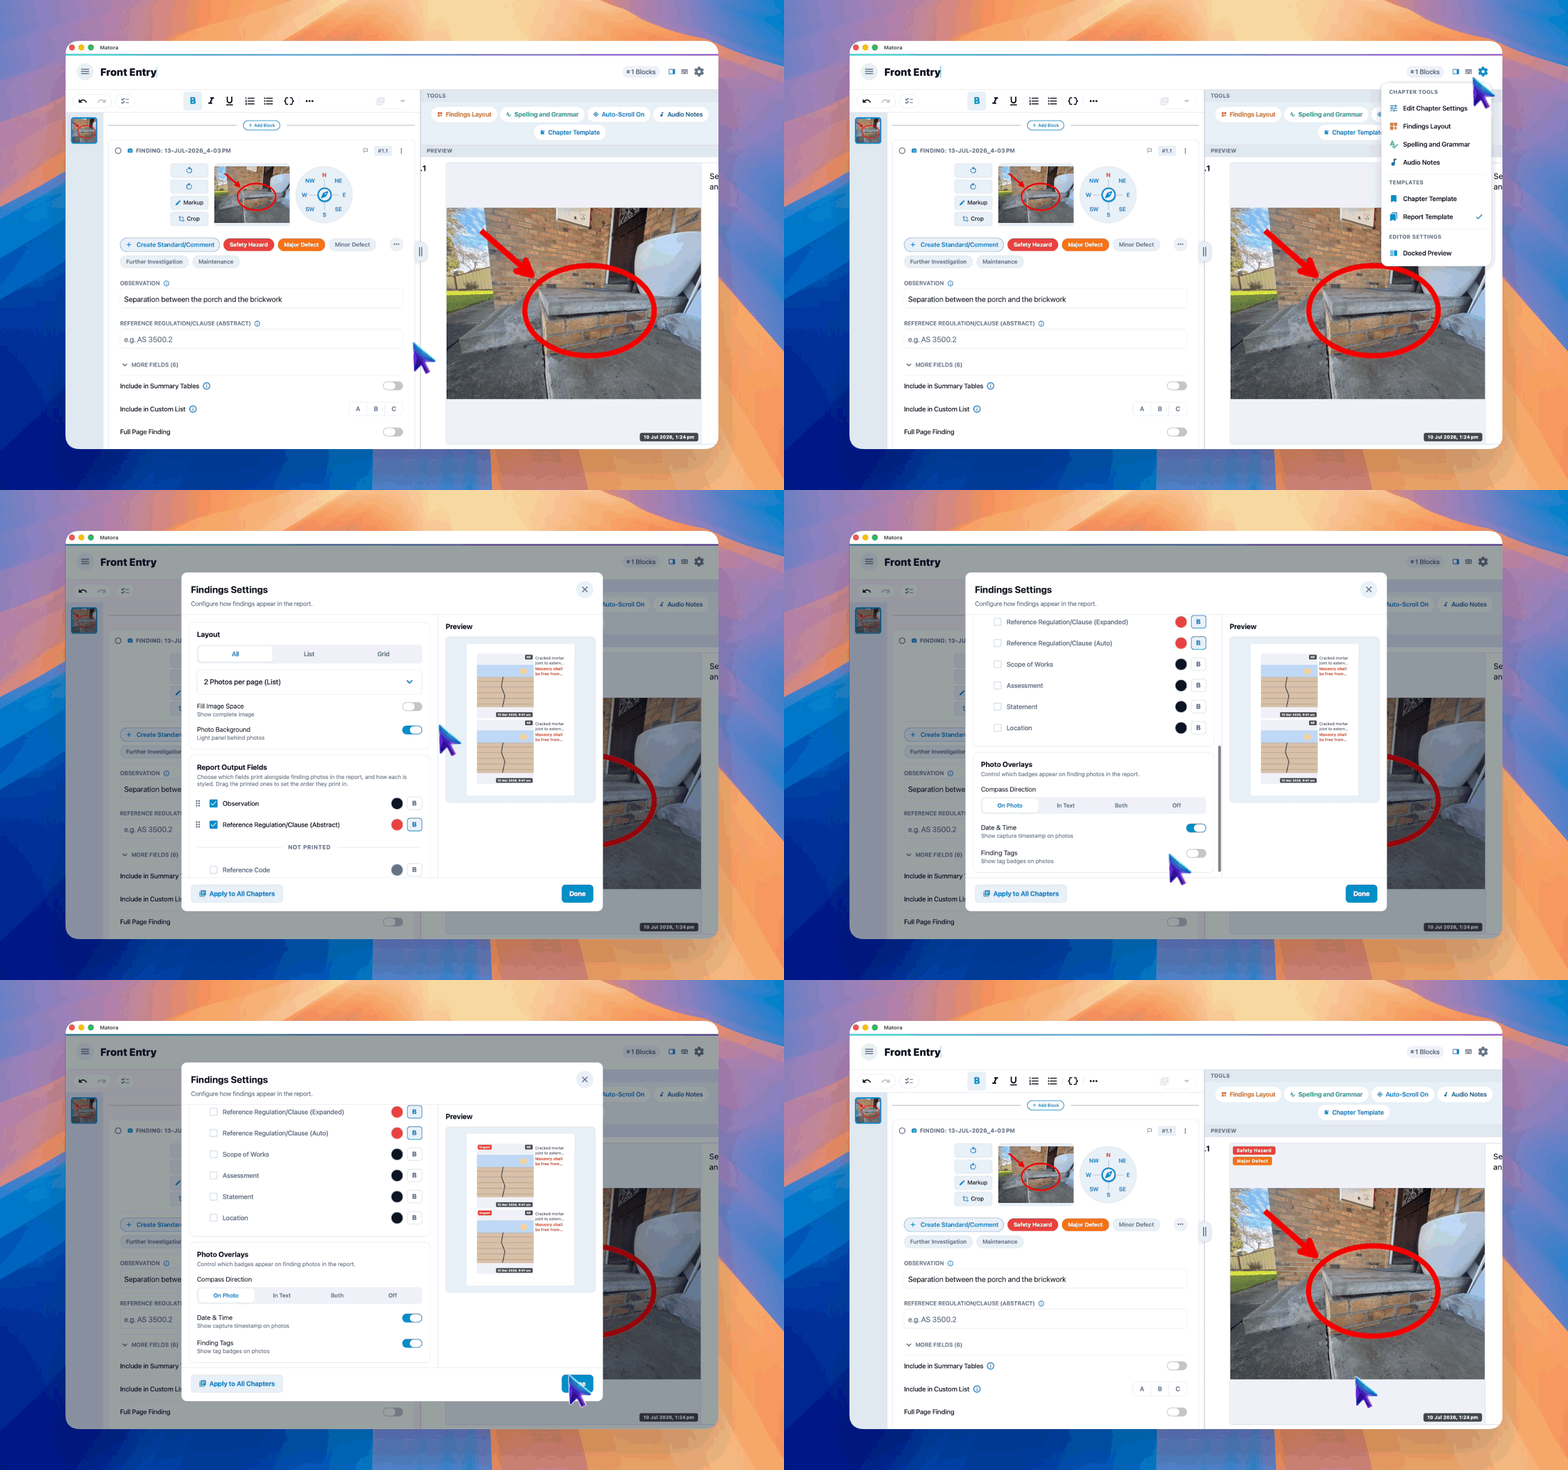
In the app: Open Finding Settings · Settings → Report Findings
- 1Open Settings → Report Design → Findings.
- 2Under Photo Overlays, turn on Finding Tags.
- 3Check the live page preview to make sure the badge colour and position work with typical photos.
Edit or delete a tag
Select an existing tag in Settings to change its name or colour. Use the delete button when the tag should no longer be available. Findings that previously used a deleted tag continue to work, but the deleted tag no longer appears as an available label.
Before renaming or deleting a tag, consider how it is used by Standards Library defaults and tag-filtered report blocks. Changing the company’s tag structure may also change how future findings are classified.