
Build your standards library
Create standards sets, organise them into categories and write entries that fill a finding completely when they are inserted.
Updated
A standards library is built from the top down: a set holds categories, and categories hold the entries your team inserts while writing reports. Setting up the structure first takes a few minutes and saves rearranging entries later.
Owners and administrators can build and edit the library. Everyone else can read and search it, and an owner can give an individual team member permission to edit. The library is built on iPad or Mac.
Start with a set
In the app: Open Standards Library · Settings → Standards Library
- 1Open Settings → Templates & Libraries → Standards Library.
- 2Select the + button at the top right.
- 3Give the set a clear name in Set Name, such as Plumbing Standards.
- 4Select Create, then drag your sets into the order you want them listed.
A set usually represents one edition of a code, or one service you offer. Keeping editions in separate sets means you can duplicate the whole set when a code is updated and revise the copy, while older reports keep referencing the wording that applied at the time.
Organise with categories
Open a set and add categories inside it. Categories can be nested, so a broad heading can hold more specific ones beneath it, and both categories and entries can be dragged into the order that suits your team.
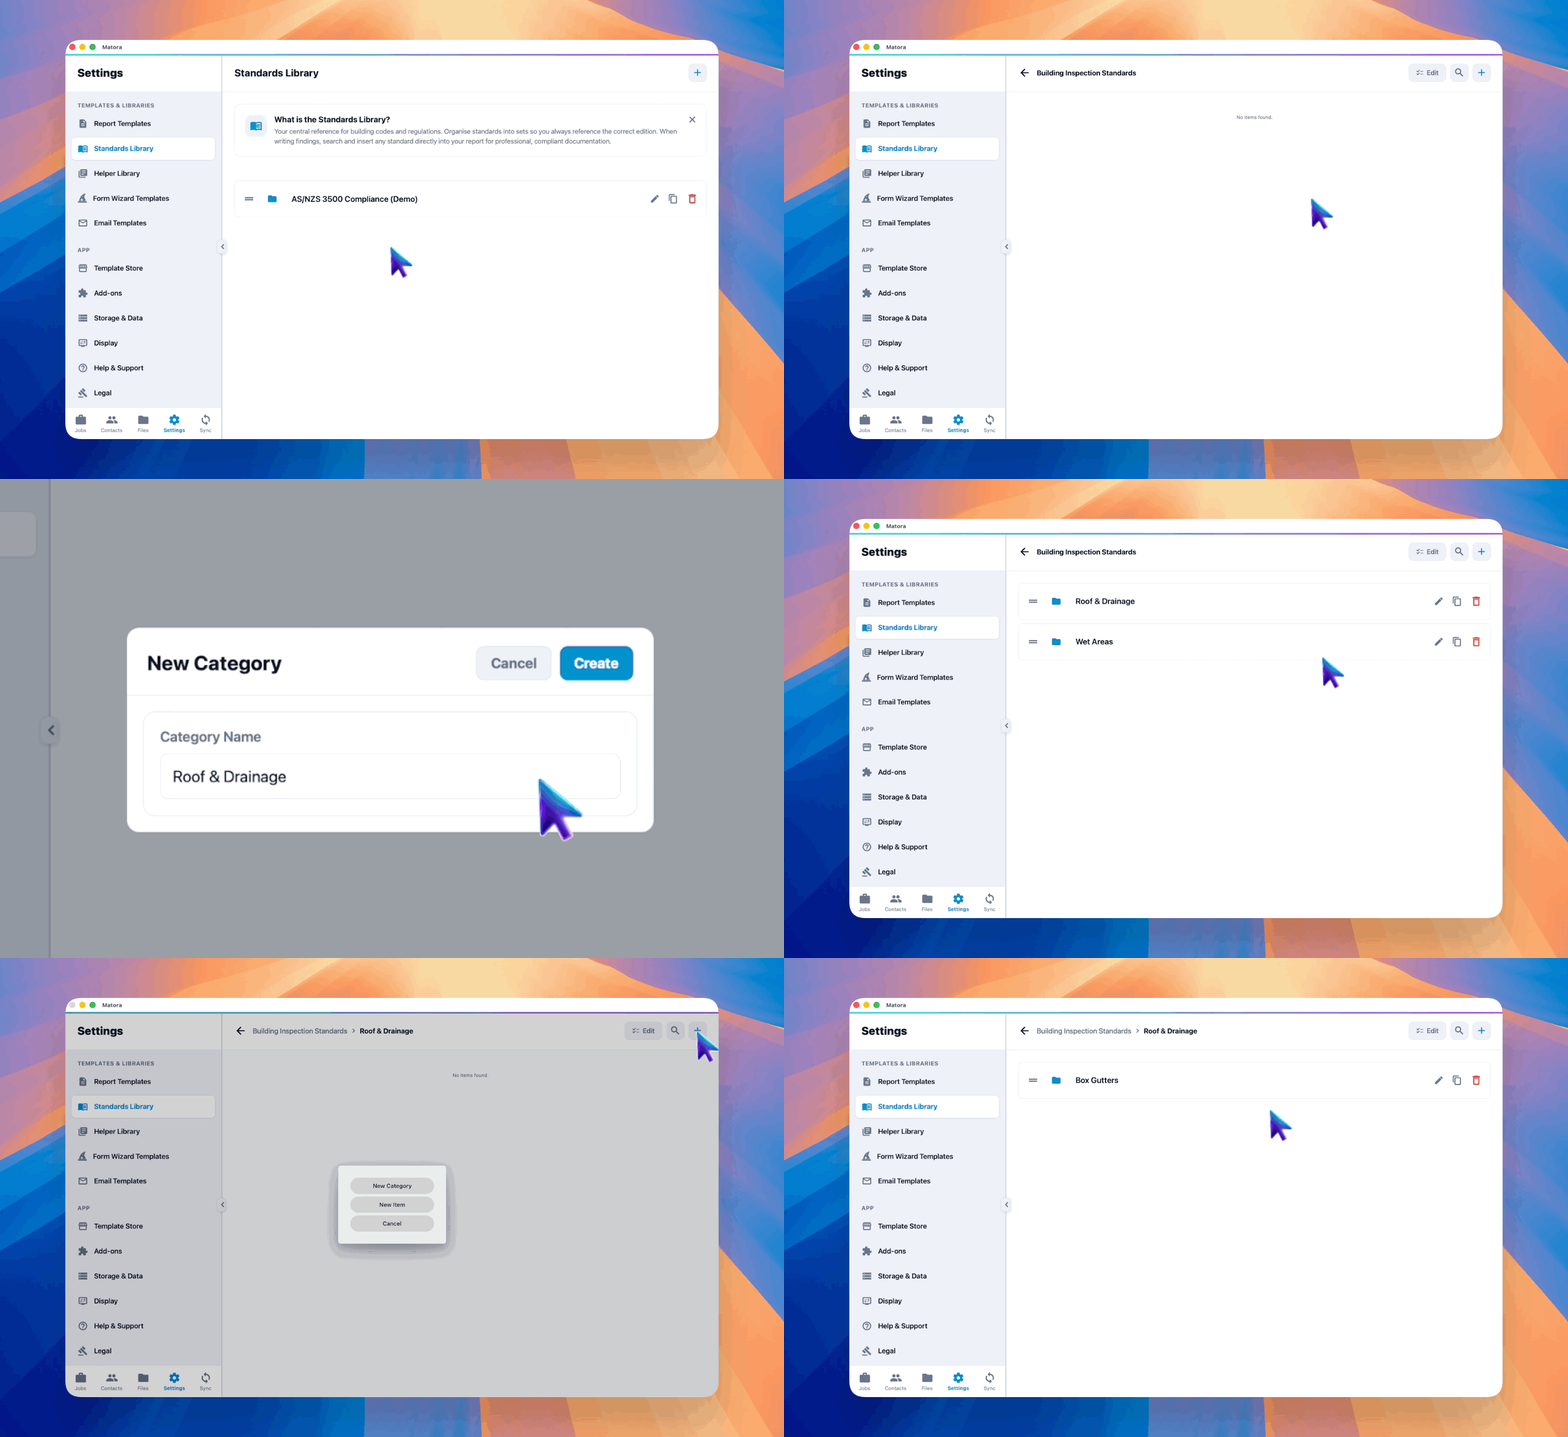
Name categories the way an inspector would look for them on site, such as Hot Water or Roof Drainage, rather than the way a code document is numbered. The library is searched under time pressure.
Add your first entry
- 1Open the category the entry belongs in. Entries cannot sit at the top level of a set.
- 2Select the + button, then choose New Item.
- 3Enter a Reference Code, such as a clause number or an internal reference.
- 4Fill the fields your reports use, then select Done.
Observation, assessment and statement
Three of the fields form a chain of reasoning, and entries are far more reusable when each one stays in its own lane.
- Observation: what can be seen on site. Factual, specific and measurable, with no conclusions drawn yet.
- Assessment: how that observation relates to the requirement, citing the standard, manufacturer guidance or accepted practice.
- Statement: your position based on the assessment, including the cause if it is known and whether the item is compliant or defective.
Resist writing the conclusion into the observation. An entry whose observation stays purely descriptive can be reused on jobs where the same defect leads to a different recommendation.
The two reference fields
The regulation is stored twice, at two lengths, so the same entry can suit a compact photo page and a detailed appendix without being rewritten.
- Reference Regulation/Clause (Abstract): the short version. A sub-clause or a one-line summary, sized to sit beside a photo.
- Reference Regulation/Clause (Expanded): the full version. Paste the complete clause text you want kept with the finding.
The abstract takes precedence when a finding is linked. If you leave it empty, the expanded text is used instead, so an entry with only the full clause still works.
Attach diagrams and extracts
Each entry can hold supporting images. Select Add Image to choose photos from your device, or Paste Image to take an image from the clipboard. Drag the thumbnails to set the order they appear in. While writing a report you can attach any of these diagrams to the page alongside the finding.
Pre-fill costing and tags
- Default Materials: the materials normally needed to rectify this defect, each with a description and a cost.
- Default Labour: the labour normally required, entered the same way.
- Default Tags: the classifications applied automatically whenever this entry is inserted. This section appears once your company has created finding tags.
In the app: Open Finding Tags · Settings → Finding Tags
Materials and labour are entered as finished amounts rather than a rate multiplied by a quantity. They reach a report only when a Defect Costing block has Auto-populate costs from linked standards turned on, which is off by default.
As the library grows
- Search from the magnifier in the header. It looks across the whole set and matches category names as well as entry text.
- Duplicate a set, a category or a single entry from its copy button when a new version needs the same starting content.
- Select several categories or entries with the Edit button, then move them into another category or copy them into another set.
- Reorder anything by dragging, except while a search is active.
Deleting a set, category or entry also deletes everything inside it, and there is no restore option in the Standards Library. Duplicate anything you might want back before you remove it.